Gitment: 一款基于 Github 的 Issues 实现的评论插件
hexo 的主题一般都有集成一些评论插件,如果你的主题没有请自行查阅 官方文档
由于官方提供的接口不再维护了,导致 gitment 评论插件无法登录和初始化
以下是解决方法
使用已经做好的接口
在博客目录下找到 gitment.browser.js 文件
查找第四个 post,把 post 后面的地址修改为 https://gh-oauth.pigfarm.top/
像这样 👇
1 | _utils.http.post('https://gh-oauth.pigfarm.top/', { |
这样就可以使用 gitment 了
部署接口到自己的服务器
如果你想像我一样自己写一个接口那么请接着往下看
虽然说官方提供的接口不再维护了,但是他把源码共享在 github 上了
https://github.com/imsun/gh-oauth-server
在自己的服务器找个风水宝地执行
1 | git clone https://github.com/imsun/gh-oauth-server |
测试
1 | cd gh-oauth-server |
显示:
1 | > gh-oauth-server@0.0.1 start |
修改 nginx 文件,即将自己的域名映射到本地的 3000 端口,因为 gh-oauth-server 是绑定在 3000 端口上的
新建一个 js 文件
把 https://imsun.github.io/gitment/dist/gitment.browser.js 的复制进去
查找第四个 post,把 post 后面的地址修改为映射到服务器 3000 端口的域名地址
然后把这个 js 文件上传到服务器上
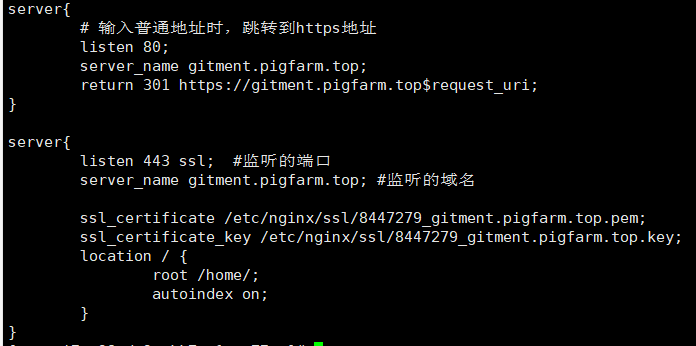
配置 nginx
最后把 https://imsun.github.io/gitment/dist/gitment.browser.js 替换成 你的域名地址/文件名
像这样:https://gitment.pigfarm.top/gitment.js
(由于 Next 主题没有集成 gitment , 所以现在使用的是 gitalk 评论插件,但是上面的接口可以照常使用)